* Welcome to Design Sense *

Hello and welcome to my blog! I hope you find my design ideas and tips interesting and helpful. My goal is to provide sensible ideas to budget-conscious designers. If you're on a budget but want to make your space look expensive and stylish then this is the place to be. Feel free to email me (my email address is provided below) if you have any comments, questions, or just need more help on a particular design plan that you're trying to execute!  Also, If you'd like to post your ideas or projects just email them to me and I'll try my best to get them on here ASAP! Thanks for visiting!


Bring the Beach Home

Bring the beach home this summer... bring back seashells and corals! This is another hot decorating trend and it couldn't come at better time! Now you have a reason to go to the beach this summer. These are great accents to any coffee table or book shelf. You can even make a candlescape or dining room table centerpiece with them

Click here to view larger imageClick here to view larger imageClick here to view larger image

Wild Things

So incase you haven't noticed already, one of the latest decorating trends is zebra and giraffe prints! These prints are very bold so use them cautiously and don't overdue it. The theme of your room doesn't even necessarily have to be a safari one, as long as you choose the right accent pieces and colors to incorporate with it. I think that natural earth tones look chic in combination with these prints, such as soft browns, blues and greens. If you want more of a bold and firey look combine it with red or orange. That type of look goes well in a game or party room. 


Check out WestElm.com, UrbanOutfitters.com, HomeDecorators.com or JCPenney

Leave Your Mark: Fingerprint Portraits

There is nothing more personal than fingerprint portraits! No two people have the same fingerprints so take advantage of that and create a unique piece of artwork.

So this is how it works! DNA 11 (www.dna11.com) specializes in making these personalized art portraits. Once you have chosen the style, color and size of your final portrait you can use their e-store to make a secure purchase. Once the order has been made they will send you a fingerprint kit with directions and everything you need to get the perfect fingerprint! Once you're done all you have to do is mail them the print that you are happiest with in the pre-addressed envelop they provide.

The total creation process takes between 4-6 weeks after they have received your sample. Now this can be a little pricy, but when it comes to most art pieces that is the case. The portraits start at around $190 for the smallest size (12x12) and go all the way up to $490 (40 x 40). Check out the website for more details and get even more personal with DNA and Kiss portraits!


Do it Yourself- Make a Tree Branch Curtain Rod


Are you tired of the boring ol' curtain rods that are overpriced? Well spruce up your window without even having to go anywhere... well except outside. First, go outside and find a strong, well-formed branch. It might be helpful to measure your window first that way you know how long of a branch you're going to need. Next, you want to prune the branch... basically you want to cut out the bad parts of the branch and re-shape it so that it looks good and is cleaned up. The final step is to spray paint the branch whatever color you desire!
Once the paint is dry you can hang it up using the typical brackets that you would use with any other curtain rod. Now when you are making or picking out curtains for the branch you want to make sure that they either tie or have some other type of hanging feature that you can easily hang from the branch, such as rings or velcro. Furthermore, you can't slide the curtains open and close like traditional ones, so you'll have to devise some type of tie back system to open them up. If you already have blinds on the window you can situate the curtains so that they are somewhat open. This way you can open the blinds and already have the curtains open a bit to let sunlight in. This creative, fun, money and time saving idea is brought to you via www.designmilk.com!

Eco-Friendly Meets Inexpensive

Looking for a unique and inexpensive floor idea? Well look to cork.... yes cork as in the cork that it is used for wine bottles and bulletin boards! Cork is the latest in flooring methods and it comes with an extra plus... it's eco-friendly. So now you can save money and save the environment at the same time!


Cork is a natural product that comes from the barks of trees only. It's an easy way to warm and enrich any interior. It comes in a variety of different textures, patterns, and colors (green, red, chocolate, black, etc) so it is easy to match it up to any space. Some other advantages of cork are that it is sound absorbing, anti-static, insulating, anti-allergenic, and durable to sustain all kinds of traffic. Because it provides natural thermal insulation it preserves energy, and can therefore cut heating bills.
I would advise you to not use cork floors in basements, bathrooms, or any other room or space where water leakage or flooding is a potential problem. Like hardwood floors, water can be damaging to cork as well. However, it is just as durable, if not more, as wood and vinyl flooring. Finally, just like hardwood floors cork floors can definitely result in a substantial return on investment by increasing the value of your home!

5 Ways to Make Your Bedroom Better for Rest

A bedroom should be designed and decorated for SLEEP! Because sleeping is so imporant there shouldn't anything getting in the way of it... no excuses! Thus, every element of the room is essential to ensuring that the ambience is cozy and tranquil. Below are some design tips to help you get your bedroom under control and ready for you every night!


Tip #1- According to designer Ammie Kim, neutral, medium tones of paint colors are the best for bedrooms. If you are usually attracted to bold colors than use them somewhere else, such as the living room where all the action takes place. If you simply can't do without those bold colors, than you can even take your favorite bold color(s) and use toned-down versions of it for accent pieces in the bedroom.


Tip #2- Choose artwork that makes you feel relaxed to reinforce the feelings associated with rest and sleep. Romantic and scenic art pieces, abstract art, or even stenciled words such as "dream" are good options.


Tip #3- Use simple furniture layouts with the bed placed alongside the window and not directly across from it, if there is one in the room. This layout allows you to enjoy the view (if there is one), while at the same time blocks you from the light coming in if it is too bright. Additionally, create a furniture layout that is spacious. Do not clutter the room with furniture and accessories, and don't over decorate the room.


Tip #4- If nature makes you feel warm, relaxed and refreshed than use it to your advantage. Find ways to bring nature indoors and right into your room. For example, use a color palette that replicates the outdoors such as the beach, sand and blue tones. You can even purchase scented candles and oils in order to bring the smells from nature into the room. Finally, you can utilize artwork that showcases outdoor scenes.


Tip #5- Tap into your sense of touch when choosing linens and other fabrics. Find high thread count linens that are used in high-class hotels. My favorite is the Hotel Collection because they have the most luxurious and comfortable bed linens and towels.

Budgeting Guide to a Stress-Free & Successfull Makeover

Budget is never a fun word to hear! It limits your options and makes planning more stressful, especially when you have big ideas and a little budget. More importantly, you can still splurge a little if you make smart decisions. However, even when you don't have a budget persay, it is key to stay in line and to not get carried away with ideas! You don't want to overdue a project to the point where you won't get a return on your investment. You want to make sure that every penny spent is a penny well spent.

The number one rule of thumb is to stay focused and stick to your budget! Follow the decorating budget guide below and you feel better about your plan and the overall space post makeover!


1. Make a wishlist: Write down everything you'd like to do and everything you'd like to buy. Be as specific as possible by thinking about what specific things that you want to achieve actually mean. For example, more storage and display space is too vague... it might actually mean adding built-ins or wall shelves. So, that is what you want to put on the list. Don't hold back from writing down what you really want, however don't forget to include the practical stuff that may need to be fixed or upgraded.


2. Crunch the numbers: Be brutally honest and determine your actual budget. Be realistic and if the money really isn't there put the project off and set a savings goal so that you can afford to execute the project at a later date. Really think about how much you will feel comfortable spending.. don't make any hasty decisions... the final product won't be worth it and enjoyable if you are going to have decoraters' remorse and regret spending as much as you did.


3. Do your homework: Before you make the itemized budget list do some thorough research on the Internet, in catalogs, in stores, etc. Find out how much everything you want to get will cost at every possible place that it is available to be purchased at. This will ensure that you will get the best value and savings. Furthermore, find out how much help is going to cost if you're going to need professionals such as electricians and plumbers. Don't be in a hurry to buy everything. Afterall, you wouldn't turn in a half finished research paper for school now would you?


4. Priortize: This is one of the most significant, yet possibly the most difficult step to budgetting. Take your wishlist with the real costs of each item and along with your total budget figure guide start eliminating items from the wishlist. This will allow you to be practical and pick apart what you really want from what you actually need. Do you want a new bathroom or living room first?


5. Draft your decorating plan: Put the design blueprint on paper including a detailed vision of the project. Include the work to be done, the items to purchase, other tasks (i.e. removing wallpaper or the old carpet), and the amount you expect to spend on each task or item. You can use computer programs such as Excel to make a neat and easy to follow spreadsheet. Furthermore, include a timeline of the projects and shopping in chronological order.


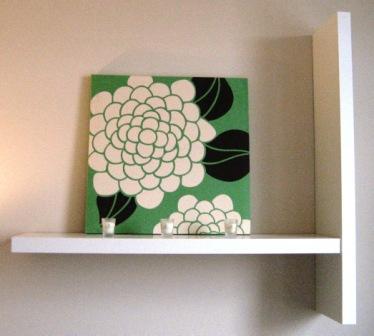
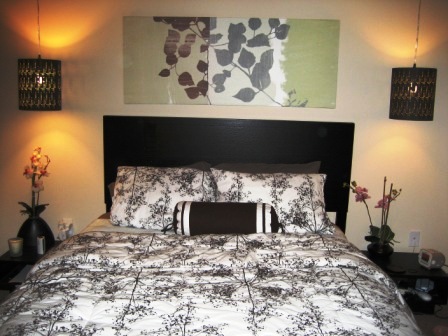
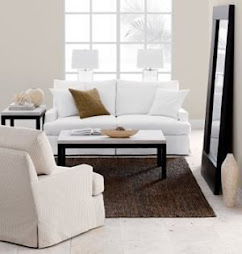
6. Splurge where it counts: Splurge on the big "wow" type of items... the things that are the most noticeable in the space, the things that will add the most value to your home, or the things that will be used regularly and therefore hold their value the longest over time. Some examples include: new flooring like hardword floors, investment art, classic and well-made furniture, and built-ins. By following these guidlines when splurging it makes you feel good and as if you're not splurging to begin with, because the splurge was well worth it. Thus, splurging will never feel better!


7. Know when to scrimp: Once you have listed all the big, most expensive and essential items needed, such as furniture and flooring, tackle the rest of the budget. Use what's left for extras, such as linens, lighting and decorative accessories. All of these items are ones that are available at different price points and can be switched out later if you get tired of them or want to upgrade them when you have the extra money to splurge. So, most significantly don't buy trendy furniture pieces, but rather save trendy for accessories.


8. Make trade-offs: Juggle expense as needed so that you can stay under the set budget. Most times you will have to review, rethink, reevaluate and adjust the plan until you arrive at the most practical and sensible plan. If you find a bed that you absolutely love and can't live without...get it and be frugle when looking for nightstands. If you find out that the hardwood floor you originally had on the plan is going to be too expensive afterall, opt for the next step down in laminate wood flooring. It's a give and take relationship... so you can still get what you want if you are willing to sacrifice other items that you still need.


9. Keep common budget busters in mind: Be prepared for unexpected and unforseen events and issues. Take 10 to 15 percent of the total budget and set it aside for unexpected expenses. This happened recently to me when I went to buy a console table to set under the plasma TV that we hung on the wall. I found the perfect console table that matched the coffee table that I had for awhile and it took me forever to find something that matched so well. Unfortunately, the table was discontinued and they wouldn't sell me the floor model. So, I had to settle for another one that was in the same collection but was less perfect and of course more expensive, although it was still stylish and served its purpose. Luckily, I had set my budget for the table a little higher since I know that I tend to end up liking the more expensive things. However, if you don't plan ahead than budget busters can really effect the plan especially when you are already midway through the project.


10. Phase it in: Don't get disappointed if the budget is not enough to pursue everything that you want to accomplish. You can make the plan a long-range one and implement it in phases.. this is especially a good idea if you have high standards and thus find it difficult to prioritize and not splurge. If you do decide to implement a phased plan it would be beneficial to consider the following timeline and tackle jobs in this order: backgrounds and surfaces (ceilings, walls, floors), buildables (built-in shelving), furniture, fabrics, lighting and accessories. Don't pressure yourself to get it done all at once... it is more gratifying and smart to get it done in phases, hence getting it done right, within a reasonable and stress-free budget, and just the way you dreamed about!

Let There Be Light


Although light is something that we can't live without, it tends to get neglected during room makeovers and decorating plans. Replacing old lighting fixtures or revamping them is a simple way to change the look and feel of a room. Good lighting equals a bright future in any space!! There are four main types of lighting: general lighting, accent lighting, task lighting, and natural lighting.

General lighting is probably the most familiar type to people because it gives the basic and overall amounts of light to a room. It is just what you would need to function safely in the room, for example the main front and center lighting fixture in a room. Accent lighting accentuates and draws attention to special features and details in a room. Usually this is done purposefully in order to give special attention to features such as artwork or collectibles. Finally, task lighting is essential because it is needed to help you get particular everyday tasks and activities done, such as reading or applying makeup. Furthermore, effective task lighting enhances visual clarity and keeps the eyes from getting tired. Natural light comes from windows and fireplaces. Natural light, especially sunlight, is your best friend. Never cover up or block a window .

I recently found a chandelier on sale and decided to use that to my advantage. I wanted to put a special lighting fixture in my office above my desk so the half off modern chandelier was the perfect fixture to get the job done. However, I soon learned that there is a formula to hanging chandeliers.

First, you want to choose a chandelier that is a little more than half the width of the table that it is going to hang above. Secondly, when you go to hang it you want to make sure that the bottom is about 30 inches above the top of the table. Now if you get stuck in a bind where the chandelier happens to be too big for the table than don't freak out and throw it away... all you have to do is hang a little higher. The formula to ensure that it looks proportional is to hang it up one inch higher for every inch that it is too wide. Finally, don't buy a two-tier chandelier unless your ceiling is at least nine feet tall.

Another creative type of lighting fixture are wall sconces. This allows the light to direct in an upward direction and appear as if it is glowing. You can also install dimmers to the sconces so that you can control the levels of brightness. Also, they come in different types of colors and materials such as glass, metal and ceramic.

Design Sense for Dual-Purpose Rooms

Okay so we are all guilty! So, we have a room that we designate as say the dining room. Well, next thing you know it's the office and computer room too! So now you have one room with two or three functions. This is especially common in small spaces, such as condos and apartments where there are just not enough rooms for your everyday needs and belongings. Well now there is nothing wrong with trying to use a room to its greatest potential, but there is something wrong with a non-functional, cluttered and unorganized dual purpose room. So, take a look at the top 10 tips that I found for designing spaces that work double-time! (HGTV.com)

1. Rethink little-used rooms: Turn those rooms that never see daylight or people into a useful
and worthy space that can actually be utilized. Show it some love and flaunt its assets.

2. Make the most of "forgotten" spaces: Find all the awkward and underutilized spaces in your
home and take charge! Give them a purpose and turn them into functional spaces.

3. Get into the zone: multipurpose spaces should be thought of as "zones." Ask yourself what
important activities are going to happen there, allocate separate areas for each activity, and
list the items you'll need for each space. Map out the room with each designated zone so that
the furniture and accent pieces are functional and serve a purpose.

4. Divide and Conquer: In order to create a feeling of separation between each zone think
about either visual and invisible barriers between the zones. To conquer visual barriers you
can use bookshelves, curtains or room dividers/screens to break up the space. Probably one
of the easiest ways to divide a living room with another space is to pull the sofa away from
the wall and position it so that it is defining the living area, yet at the same time separating
it from the next space.

5. Create "rooms within rooms": If you want to utilize barriers without using obvious dividing
pieces, then you can always use rugs to define and unite different areas. For example, you
can purchase two different rugs to separate a dining room from a living room, or paint one
space to accentuate the division.

6. Strive for Stylistic Unity: Although each section of the room is going to serve a different
function, make sure that the overall space is unified. You can accomplish this by sticking
to a cohesive color pallete, design style, wood tone and fabric selection. You want the dual
purpose room to appear spacious and functional with consistent decor choices.

7. Opt for flexible furnishings: Look for dual purpose furniture. In a room that needs to serve
many different functions it is always helpful to get furniture that can also serve different
functions. For example, a lidded ottomon that doubles up as a coffee table or storage bench.
Daybeds or futons are also practical because they can be used as extra seating spaces or
sleeping spaces for sudden guests.

8. Think small and scaled-back: Don't choose elaborate and oversized furnishings. They defeat
the purpose of a multipurpose room. Instead, think simple, thin, modest, and compact.

9. Incorporate storage: Good storage prevents a chaotic mess! If the space is small think about
heighth and not just width. You can get bookcases or shelving units that take up more space
vertically from floor-to-ceiling.

10. Light the way: Adequate and adaptable lighting is a must have! Make sure to designate
lighting zones to differentiate the spaces and help each space individually. Wall mounted
are great space savers in small spaces!


What's Your Color Personality?

Have you ever wondered what color you would be if you were one? Well wonder no more... the answer is finally here! I know by speaking from my very own personal experiences that there are times when I feel somber and sad so I associate it with a blue mood. During that period I might wear more blue outfits than I would normally. Then, there are times, especially during the summer months, where I am my happiest and prefer bright cheery colors like yellows and reds. So, does that make me a dark purple, a mix of all of those colors? Not necessarily. It is definitley more complex than that.

RED
Red is a color of passion, power, boldness and high energy. People who match up best
with this color are self-confident and are risk-takers!

PINK
Pink people are playful, innocent, flirty and fun. They are dynamic and romantics.

ORANGE
Orange lovers are intense and serious. They are methodical decision-makers who take
pride in acheiving their goals.

YELLOW
Yellow peoples' outlook on life is sunny, hopeful and bright. They are spontaneous and
cheery that always inspires others. Yellow is said to be admired by intellectuals because
it is said to stimulate the mind.


GREEN
This color is natural, healing and refreshing. Thus, if you like this color you like to solve
problems with a fresh perspective and a dose of quick-witted humor. You are a peaceful
and tranquil individual.

BLUE
A blue person is steady, stable and compassionate who is very devoted to those they
love the most.

PURPLE
This is a person who relies on their keen intuition to guide them through life's challenges.
A purple person is mysterious, sophisticated, and creative. It is a good balance of
authority (from reds) and serenity (found in blues).

BROWN
If your favorite color is brown then you are earthy, sensual, comfortable, and secure.
Furthermore, you are authentic and like to live in the moment.

BLACK
People that favor black are most likely to proceed with caution when it comes to sudden
changes. They also exercise restraint when making decisions. People who like black are
solid, classic and orderly people.

WHITE
This color is for rational minds who rely on their analytical powers and objectivity to
solve problems. It helps people free their minds to pursue new options.

Don't Be Scared of Color


I think that the number one aspect of a room makeover that people are always scared of is COLOR! Most people like to play it safe and keep things simple with white walls. They don't like to venture out into the wonderful and exciting world of COLOR! So, one of my words of wisdom is to break away from the drudgery of boring white walls and add some COLOR into your life! Don't run from it... run to it! Adding color to a room is by far the easiest and cheapest way to spice up a room and make some impact. Okay, so if you don't want to take a huge plunge into the color wheel and you'd rather take baby steps then even neutral based colors is a good start. Another way to ease into is to just paint one accent wall. So here is how you do it right!

The secret to a good color combo is the 60-30-10 Rule. This means that 60% should be the dominant or base color, 30% the secondary color, and 10% an accent or "punch" color. Furthermore, when choosing the colors make sure to keep a couple of things in mind. First, pay close attention to the natural light coming into the room via windows. If you have a room with a lot of windows natural light will definitly make the colors look different when the natural light coming in is at its brightest or vice-a-versa. Secondly, be careful when working with dark paint colors because they make a room feel and appear smaller. If the room is already small to begin with, don't paint it dark because it will only make it feel even smaller! Finally, don't forget about the good ol' accessories and accent pieces that you already have, for example your favorite rug, artwork or pillow! Use these items as inspiration and encorporate them when choosing your color palette. A plus to this method is that it always saves money and it serves as a starting point for the whole design concept.


When choosing colors you also want to make sure that the colors reflect the overall ambience and emotional impact that you want to set for the room. If you want to make the room a serene and subdue place to read and take naps in, you don't want to choose lively colors like bright red or hot pink. Instead, you'd want to stick to earth tones like fall colors and blues.

So, once you have the 3 colors picked out you want to make sure you know where to put them. This is when you want to think "vertically." Use darker colors for the floor, medium values of colors for the walls, and the lighter colors for the ceiling. This really makes a space look cohesive and as if the colors really do belong together. Also, don't forget to think back to the 60-30-10 Rule. Lets say that you choose an off white shade, an olive green color, and a dark grey for your palette. The medium value shade, olive green, will be the wall paint color. The dark grey will be encorporated into a large floor rug and window treatments. The final off white color, of lightest value, will be appear on the ceilings and perhaps in other accent pieces such as bed linens or pillows.
So, once you have the sometimes daunting task of picking 3 colors out of the thousands of options your job isn't quite done yet. Color placement is crucial to the finished makeover results. If you have the colors but don't know what to do with them then you haven't made much progress. Thus, always be very careful when designating the 3 colors their positions in the space.

Light-Up Shadowbox Wall Art

Turn a boring lonely wall into a glowing piece of photo art! Check out this quick, easy and stylish photo wall art piece made with shadowboxes and a glittering twist, Christmass tree lights! The only materials that you need are shadowboxes (however many you wish to use), Christmas lights, your favorite photos, a staple gun, spray adhesive, and etching spray. Once you have your materials follow the instructions below and start showing off your favorite photo memories!


Step 1: Cover the photographs with a spray adhesive and place it face down on the glass pane of the shadowboxes

Step 2: Coat the remaining exposed glass edge with etching spray to add a frosted look and let the glass dry.

Step 3: Arrange the lights inside the shadowboxes after putting the photo pane in place, place
the lights behind the picture so that you make sure to keep the photo visible. Make sure to get a small set of lights.

Step 4: Take a staple gun and attach the light cord to the back of the shadowboxes, letting the
remaining portion of the lights dangle down to the next shadowbox below.

Step 5: Take the remaining portion of the lights and put them in the remaining shadowboxes,
leaving enough dangling down so that you can plug it in to the electrical socket.

Extra tips: To add more flare paint each shadowbox a different color or use colorful lights or lights with just one color (like all red or all blue lights) if that flows with the theme and design of the room. You can even use different shaped shadowboxes! Also, you don't necessarily have to use your own photos. You can find prints online or at a store and scale it down to fit the size of the shadowboxes.

Plants and Florals

Bamboo and river rocks in glass vase
(Pier One Imports)

Cherry Blossoms w/a modern twist

(Pier One Imports)

Potted Grass

(Pier One Imports)

Japanese Maple Tree

(Pier One Imports)

Potpourri basket

- twig balls and basket purchased at Pier One

- potpourri purchased at Kirklands Home Store

One of the easiest accent elements to any space are florals or plants. Of course real flowers and plants can be very high maintenance, so I always stick to fake ones. The first thing to keep in mind when picking out a potted plant/flower or making an arrangement yourself is to make sure that your choices are in tune with the design scheme and theme. You don't want to make the mistake of putting tropical Hawaiian flowers in a room full of rustic and Western decor. So, don't pick for the sake of simply picking.

Another key aspect is to make sure that you aren't cluttering a space with too many plants and florals. In my living room I choose plants that represented a Zen/Asian theme. I bought a full size Japanese Maple for one corner of my living room and for table top accents I made a bamboo and rock arrangement (shown above). I purchased bags of rocks and single branches of bamboo, chose a unique looking vase, cut the bamboo down to size so that it was scaled with the size of the vase, and put it all together in about 15 minutes! You can even buy a simple, terracotta flower pot and decorate and paint it if you want to get creative. Because my dining area is open to the living room, I decided to play it safe and put a modern style potted Cherry Blossom arrangement, so both rooms would be cohesive with the Zen/Asian theme.

Finally, I executed another creative accent botanical arrangement. I found a very interesting triangular shaped basket on clearance at Pier One. It is shown above and is made of a rich colored wood woven and twisted into shape. I purchased wood twig balls and a bag of scented potpourri and mixed it all together in the basket to make an easy and inexpensive accent piece.


I love floral arrangements and potted plants because they are natural and in my opinion a form of art.... flower and plant art! They are very easy finishing touches to any space no matter what the theme.

Design Cents


Below are some great finds from Hobby Lobby! I recently bought two white bookshelves from IKEA with glass doors. So, of course I wanted the contents of the shelves to be fun and interesting since you could see right through the doors! Hobby Lobby is the perfect place for accent pieces and is definitely affordable!

Design Scents


One of my favorite extra decorating touches are scented oils. They are the new candles and they add to the overall mood and ambiance of any space. You can even match the oils to the room's theme. For example, if you decorate your bathroom in a beachy tropical theme you can buy one of my favorite Bath and Body Works oils Sea Island Cotton. It definitely makes a space more cozier and fresh. I purchase my favorite oils at either Bath and Body Works or The Body Shop for only around $7 a bottle! So use these design scents to spice up your favorite space!

Welcome to Design Sense

Hello and Welcome to my brand new blog!! The purpose of this blog is to provide helpful, creative, and sensible design tips and tid-bits! Feel free to share your thoughts and ideas anytime... even if it isn't a project that you actually came up with or executed. When I think p a design idea I always determine whether it is a sensible one or not by two criteria: is it affordable (design cents) and is it practical (design sense). Another important feature of a design project is the mood and ambience that it creates. You want to make sure that the mood and ambience represents you and is something that makes you so happy that you won't get tired of it or regret that design decision. So, with any design project or idea make sure to always use some senses!

Funny Real World IKEA spoof

BlogFlux

Directory of Home Blogs